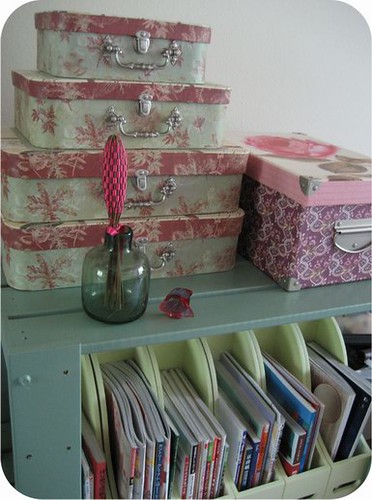
My little corner
I had mentioned some diy projects here 2 weeks ago. It's taken me a few days to complete these as I injured my back in the process of re-organizing the room.
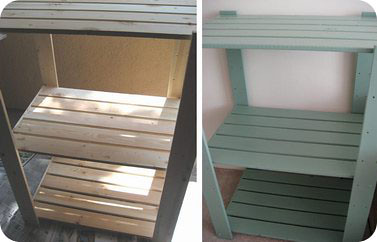
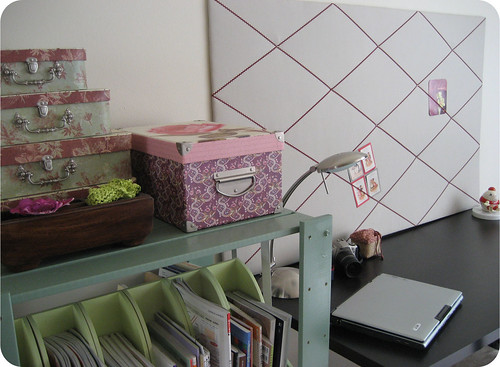
Project "Revamping boring shelves" was very easy to complete. Some sanding, 2 coats of sage paint and 4 coats of clear varnish. As you can see on the picture below, it makes a difference!
J'ai enfin terminé les 2 projets de déco que j'avais prévus de faire il y a 15 jours.
Le premier projet: peindre une étagère Ikea que je trouvais trop tristounette. 2 couches de peinture et 4 couches de vernis. Projet facile et rapide à réaliser!
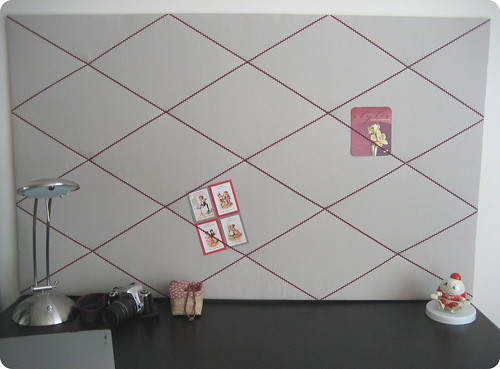
Le 2ème projet était un peu plus fastidieux! Réalisation d'un pêle-mêle.
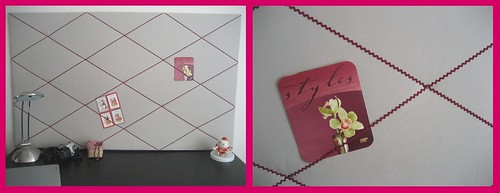
Project "Large Fabric Mood Board" was a little more tedious to complete! It will be the perfect place to put pictures, fabric samples, small items that get lost easily. It is made of a heavy duty cotton and a pretty ric rac.
TUTORIAL :
Materials
Masonite board (cut to size) 60"x36" (153x92cm) 1/4 inch thick (7mm)
Heavy duty cotton 40"x64" (102x163cm)
Quilt batting: 2 layers of 40"x64"
Ric rac (or ribbon) 12 yards (11m)
13 cut tacks (at most diy stores)
A hot glue gun, a hammer and a small staple gun
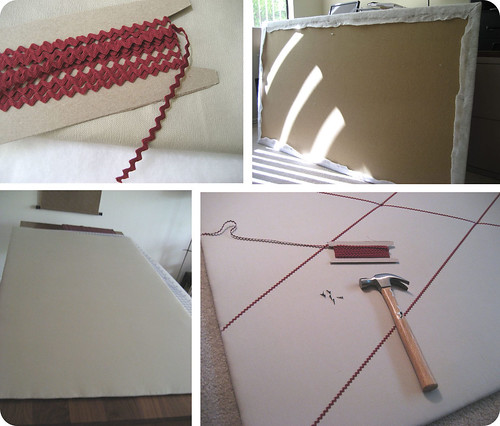
Directions
Cut the batting and fabric to size. I allowed 2" of overhang on each side). Press the fabric.
Place the board on a flat surface and with a glue gun, glue the 2 layers of batting onto the board. Miter the corners to avoid "bulk". Turn the board and glue the overhang batting.
Place your fabric on a flat surface and put the board (batting side down)on top of it. With a staple gun, first staple in the middle of each side, ensuring the fabric is stretched well. Then gradually staple towards the corners and finally the corners. You can trim some of the excess fabric at the corners if you wish.
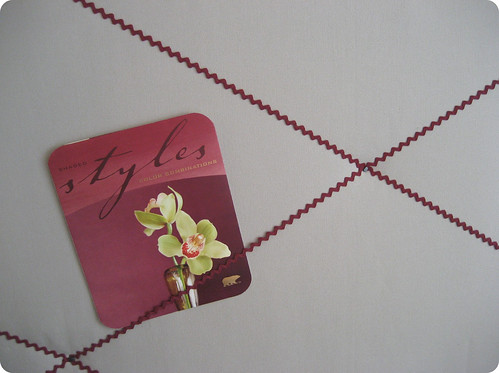
Turn the board to the right side (front). Now it's time to decide which criss cross pattern you want on your board. I used a piece of string to play with different patterns. I chose a 10 lines design which required approx 12 yards (11m) of ric rac. A design with 14 lines would have required approx 16 yards (15m)
Start with the longer lines and place the first tack where the 2 lines cross (center of the board). As you add more lines and tacks, make sure the ric rac/ribbon is really well stretched. Once you've put all the tacks on the front, turn the board and with the staple gun, staple the extremities of the ric rac/ribbon.
There are different ways of fixing the board to the wall, depending on how heavy your board is and what type of wall you have. I have chosen an easy route... Carefully drill 2 holes at the back of the board (be careful not to drill onto the fabric). Drill to holes on the walls and put 2 long nails and just hung the board like this! Thanks to hubby for his help with the drilling :)
Fournitures
Panneau de particules de 153x92cm et 7mm d'épaisseur
Tissu en cotton 102x163cm
2 rectangles de molleton de 102x163cm
Croquet (ou ruban) 11m
13 broquettes (clous très courts)
Pistolet à colle, marteau et agrafeuse electrique.
Réalisation
Découper un rectangle de 102x92cm dans le tissu et 2 rectangles de 102x92 cm dans le molleton.Bien repasser le tissu.
Poser le panneau de particules sur une surface plane. A l'aide du pistolet à colle, coller les 2 rectangles de molleton au panneau. Tourner le panneau à l'envers et coller les rabats.
Mettre le tissu à plat et poser le panneau dessus (côté molletoné sur le tissu). Agrafer le tissu sur l'envers du panneau en prenant soin de bien le tendre. Couper le tissu au niveau des coins si nécessaire.
Tourner le panneau sur l'endroit. Pour choisir le motif du croquet/ruban, prendre de la ficelle et faire des essais. Il faut compter 11m de croquet/ruban pour réaliser les 10 lignes de mon panneau. Pour 14 lignes, il faut compter 15m de croquet.
Commencer par 2 lignes diagonales. Clouer une broquette à l'intersection des 2 diagonales. Ajouter une longueur de croquet et clouer à l'intersection de 2 longueurs. Continuer le processus pour les autres lignes. Lorsque toutes les lignes de croquet/ruban sont fixées, tourner le panneau et fixer les extrémités au dos du panneau avec une agrafeuse electrique.
Il y a différentes façons d'accrocher le panneau au mur selon le poids du panneau, le mur etc.. j'ai choisi la solution la plus rapide. J'ai percé 2 trous au dos du panneau en faisant attention de ne pas transpercer le molleton et le tissu. 2 clous (grosse taille) dans le mur et le tour est joué! Je rajouterais qu'une paire de mains supplémentaire facilite certaines étapes du projet! Notamment lorsqu'il faut clouer le croquet et le tendre en même temps.
Project "Revamping boring shelves" was very easy to complete. Some sanding, 2 coats of sage paint and 4 coats of clear varnish. As you can see on the picture below, it makes a difference!
J'ai enfin terminé les 2 projets de déco que j'avais prévus de faire il y a 15 jours.
Le premier projet: peindre une étagère Ikea que je trouvais trop tristounette. 2 couches de peinture et 4 couches de vernis. Projet facile et rapide à réaliser!
Le 2ème projet était un peu plus fastidieux! Réalisation d'un pêle-mêle.
Project "Large Fabric Mood Board" was a little more tedious to complete! It will be the perfect place to put pictures, fabric samples, small items that get lost easily. It is made of a heavy duty cotton and a pretty ric rac.
Materials
Directions
Fournitures
Réalisation
posted by Soie Belle at 8:19 AM
![]()


<< Home